Adding a site icon, also known as a favicon, to your WordPress website is a simple way to make your site more visually appealing and recognizable.
In this guide, we will walk you through the steps to add a site icon to your WordPress site.
What is a Site Icon
A site icon is a unique icon that represents your website. It appears in various locations, such as your WordPress dashboard, visitors’ browser tabs, bookmarks, Google search results, and as a home screen app icon when saved to a browser or phone.
By adding a site icon, you can enhance your site’s branding and improve user experience.
Steps to Add a Site Icon
To add a site icon to your WordPress site, follow these steps:

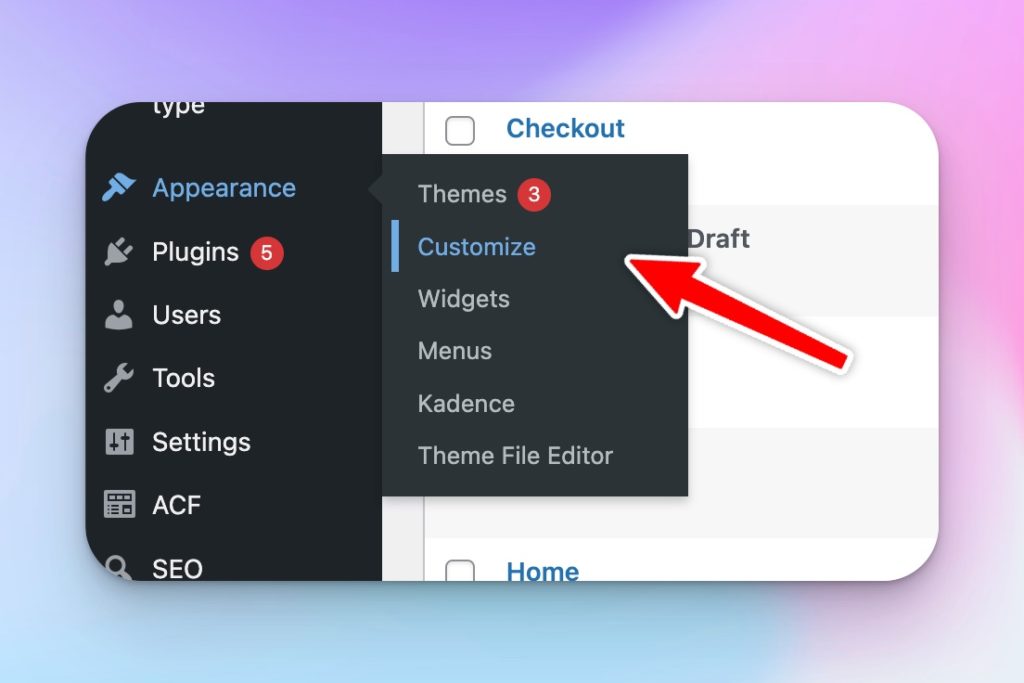
1. Go to Appearance > Customize: From your WordPress dashboard, navigate to the “Appearance” menu and select “Customize.”

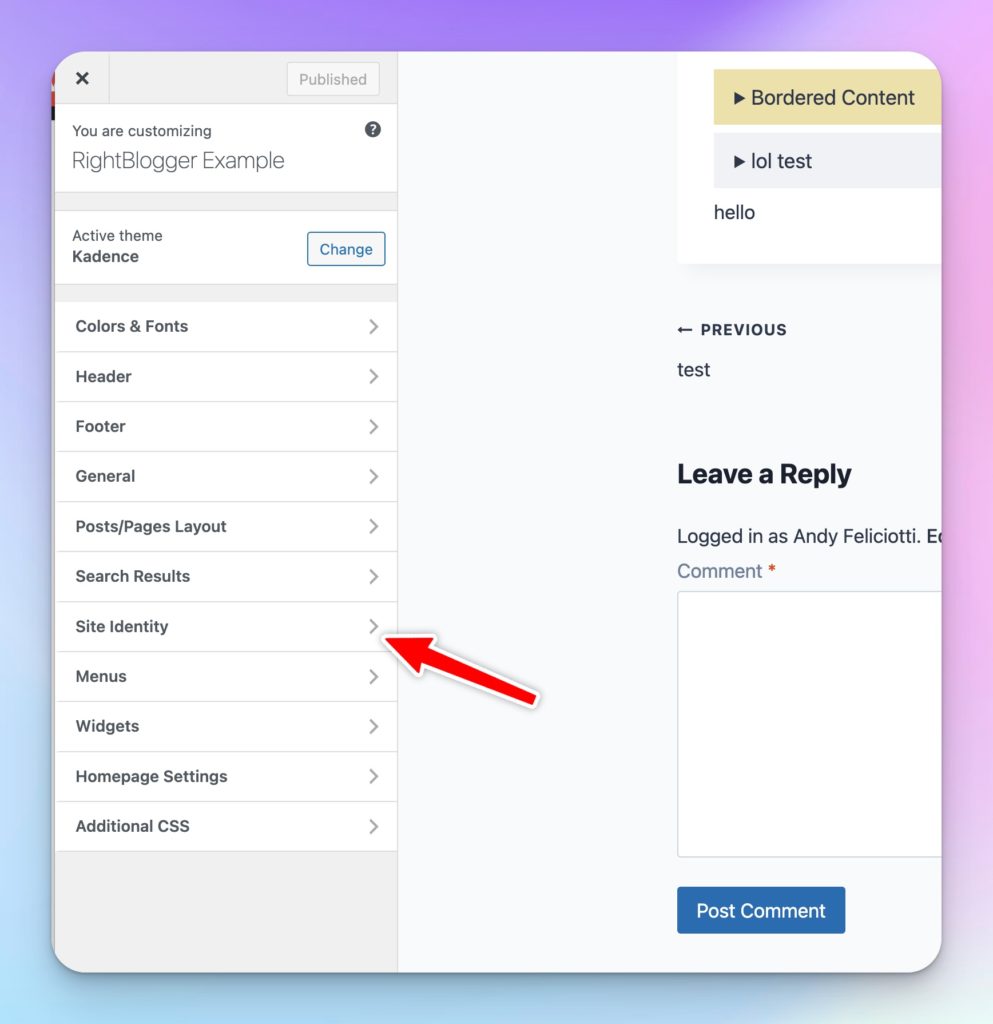
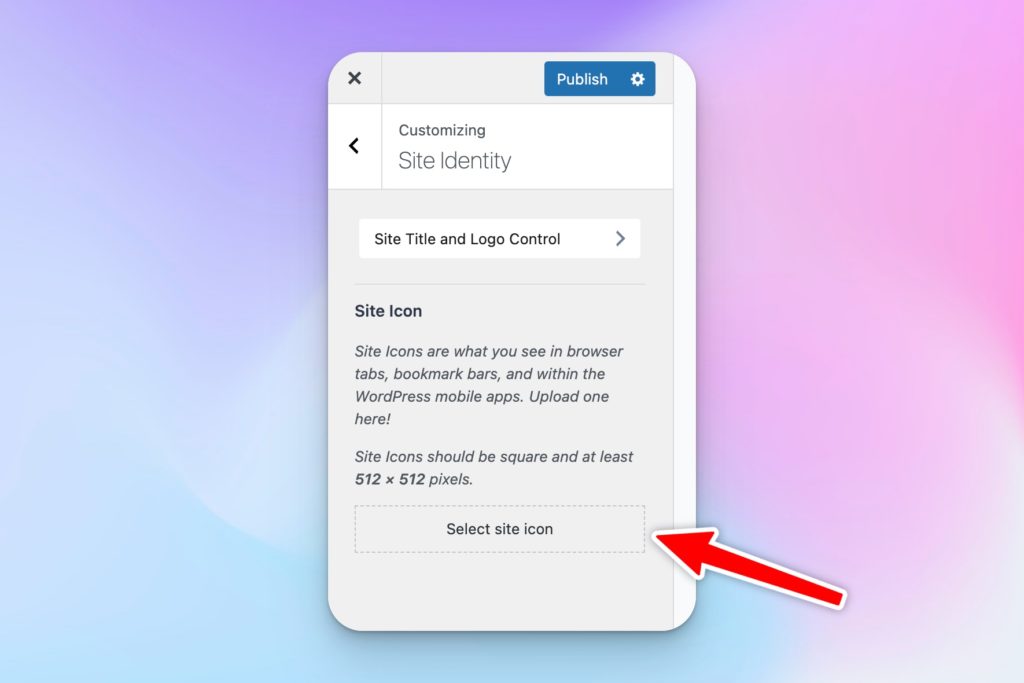
2. Use Site Identity: Look for the “Site Identity” section and click on the “Select site icon” button.

3. Choose an Image: Your Media Library will appear, allowing you to choose an existing image or upload a new one. Make sure to upload a square image that is at least 512 x 512 pixels in size. PNG and SVG file formats are commonly used for favicons.
4. Crop the Image (Optional): If necessary, you may be given the option to crop the image to ensure it appears as a square. If your image is already square, you can skip this step.
5. Click Publish: Once you are satisfied with the icon, click the “Publish” button to save your changes. Your site icon will now be displayed across different platforms and devices.
Site Icon Image Guidelines
To ensure your site icon looks its best, keep the following guidelines in mind:
- Keep it simple: Due to limited space, aim for a clean and straightforward design.
- Make it recognizable: Try to capture the essence of your brand or logo in the small favicon space. Simplify your logo if needed.
- Minimize text or lettering: Remember that favicons are small, so avoid including extensive text. Keep it concise and focus on visual elements.
- Consider color: Different web browsers use diverse color palettes, so choose colors that look good on white, gray, and black backgrounds. Ensure your favicon remains visible and stands out, even in night mode. You can use a color contrast checker to ensure that your colors are easy to read.
Removing a Site Icon
If you decide to remove a custom site icon, follow these steps:
- Go to General → Settings: Access the “Settings” menu from your WordPress dashboard and select “General.”
- Click on the Remove Button: Look for the “Site Icon” section and click on the “Remove” button. This will remove the custom site icon from your WordPress site.
Adding a site icon to your WordPress site is a simple yet effective way to enhance its appearance and reinforce your brand identity. By following these steps and considering the image guidelines, you can create a favicon that represents your site effectively.
Conclusion
Adding a custom favicon to your WordPress site is a small step with a big impact. It helps your site stand out in a sea of tabs and gives your brand a professional edge. Don’t overlook this simple yet powerful addition to your site.


2 Responses
Thanks for this help <3
Hi there,
Thanks for the nice article, i have used fav icon for my https://voltagelab.com/. Though theme has option of fav icon. but didn’t work. But it’s solve now.