Everyone knows how annoying a CAPTCHA can be but they are essential at cutting down spam on your WordPress site. From contact forms to login pages there are plenty of places for bots to spam your site with requests.
While Google has reCAPTCHA there are plenty of privacy concerns with using something from Google. This is why Cloudflare has introduced Turnstile. A simple CAPTCHA designed for privacy and UX in mind.
Now let’s give our users a better experience and add Cloudflare Turnstile to our WordPress site.
Adding Cloudflare Turnstile to WordPress
Probably the easiest way to add Turnstile to a WordPress site is to use Simple Cloudflare Turnstile.
Simple Cloudflare Turnstile adds Turnstile to WordPress login, registration, password reset, and comment forms (to help stop comment spam). Of course in addition to this it works for WooCommerce forms like login and checkout. Plus if you’re using Contact Form 7 there is also an option for that to cut off contact form spam.
1. Sign Up for Cloudflare and get a Free Cloudflare Turnstile
First you’ll need a free Cloudflare account. After signing up you’ll see Turnstile in the sidebar of the Cloudflare Dashboard. This is where you can set up your site an get your free API key that’s needed for the plugin.
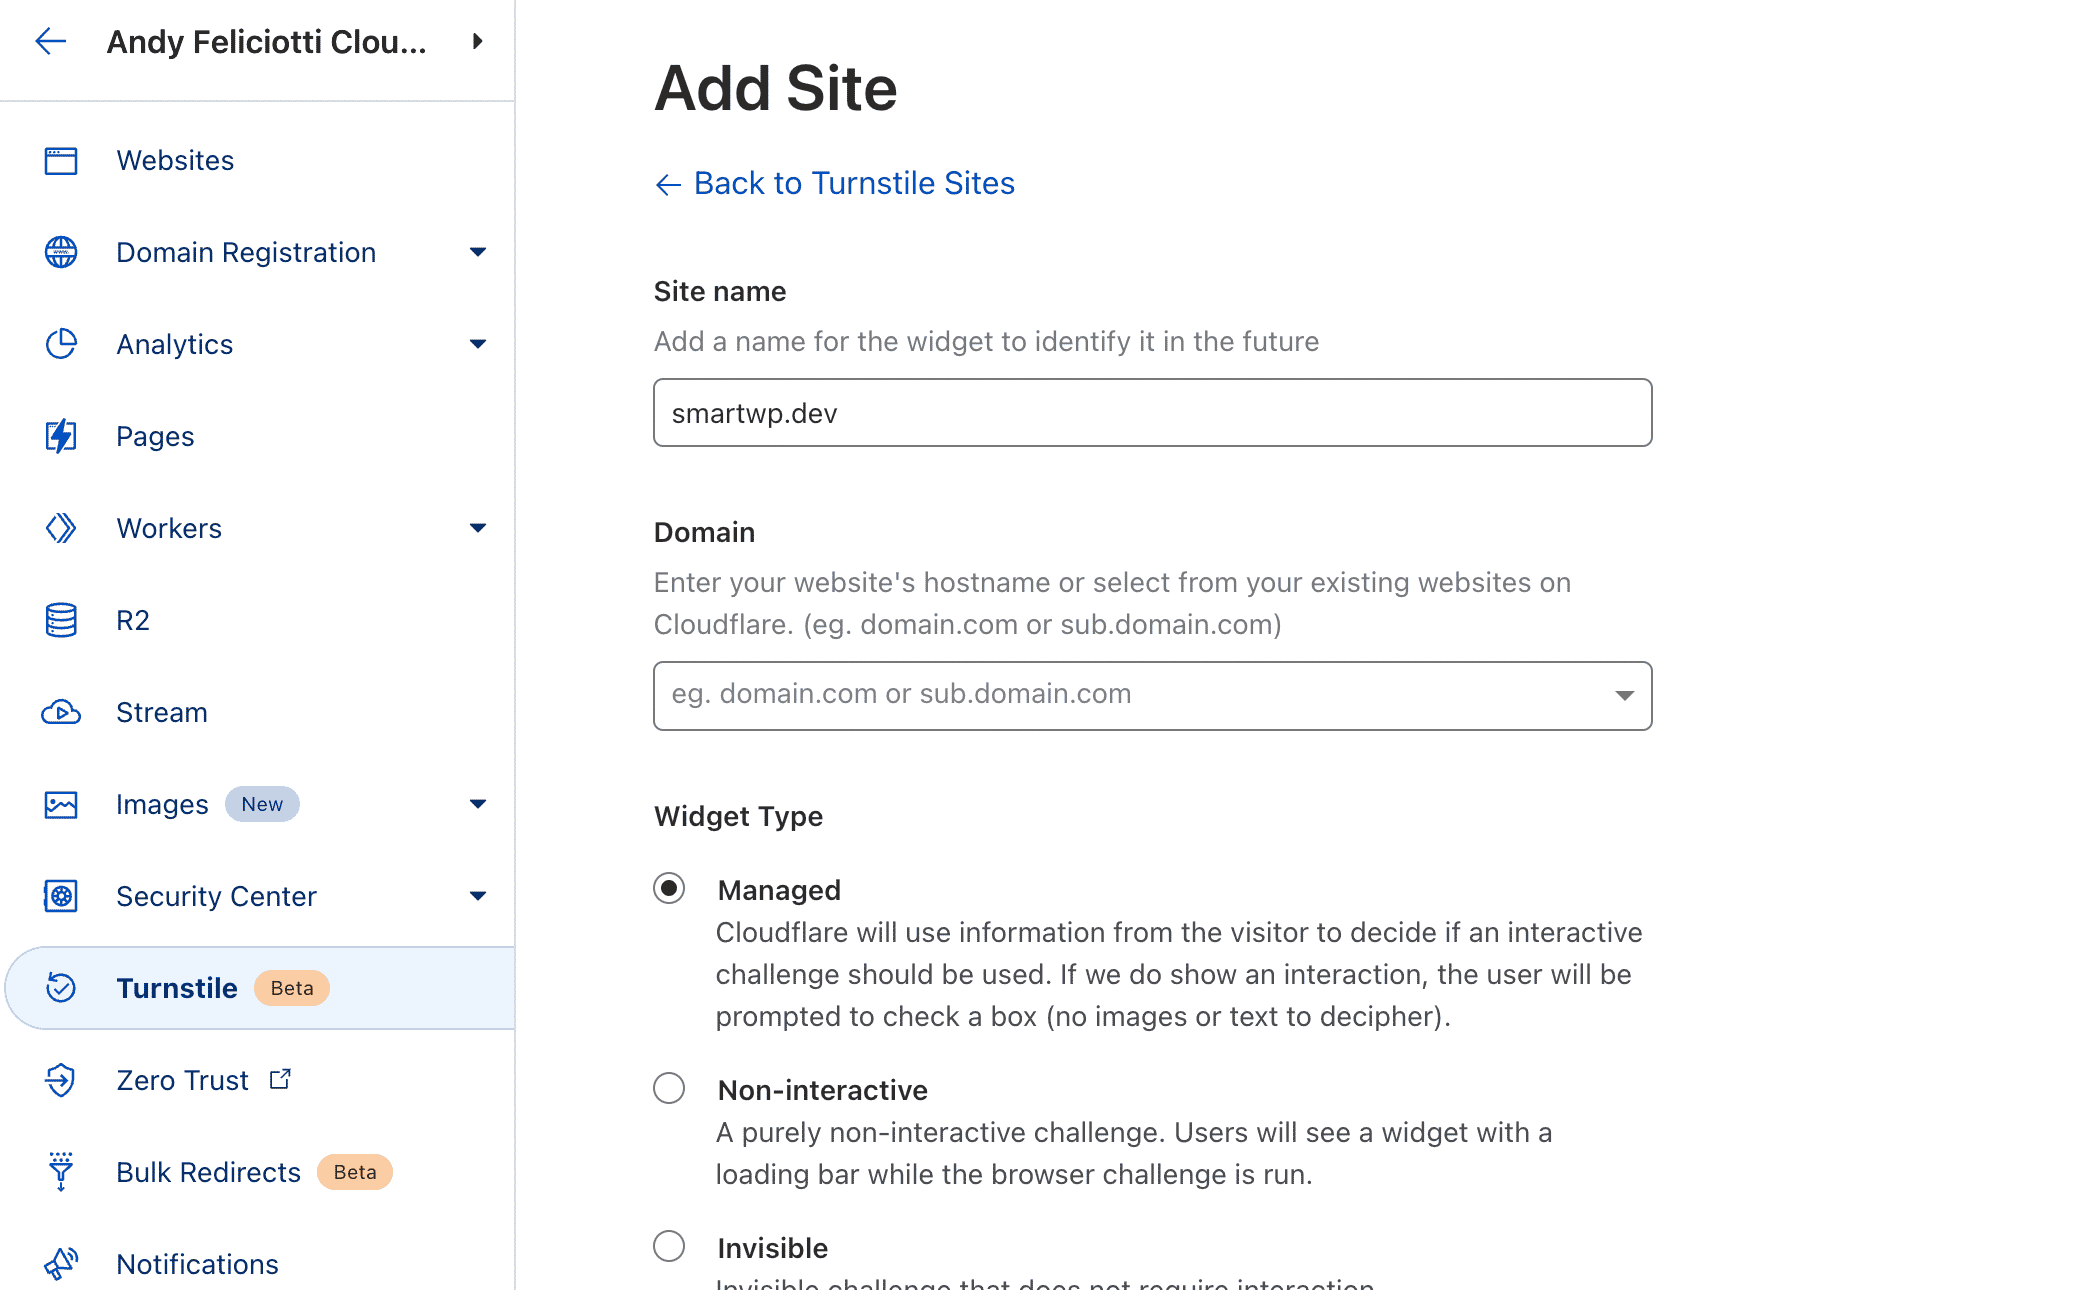
After entering a site name and domain you can select what type of widget you’d like which likely will be left on managed. Note that you do not need to route your site through Cloudflare to use Turnstile.
Now let’s install Simple Cloudflare Turnstile.
2. Install Simple Cloudflare Turnstile
Adding Turnstile to your site is as simple as logging to your WordPress admin and installing a plugin.
Like any plugin you can search “Simple Cloudflare Turnstile” in Plugins > Add New. You should see the plugin made by Elliot Sowersby. After installing and activating you plugin you’ll have a new Cloudflare Turnstile option under your settings menu in your WordPress site.
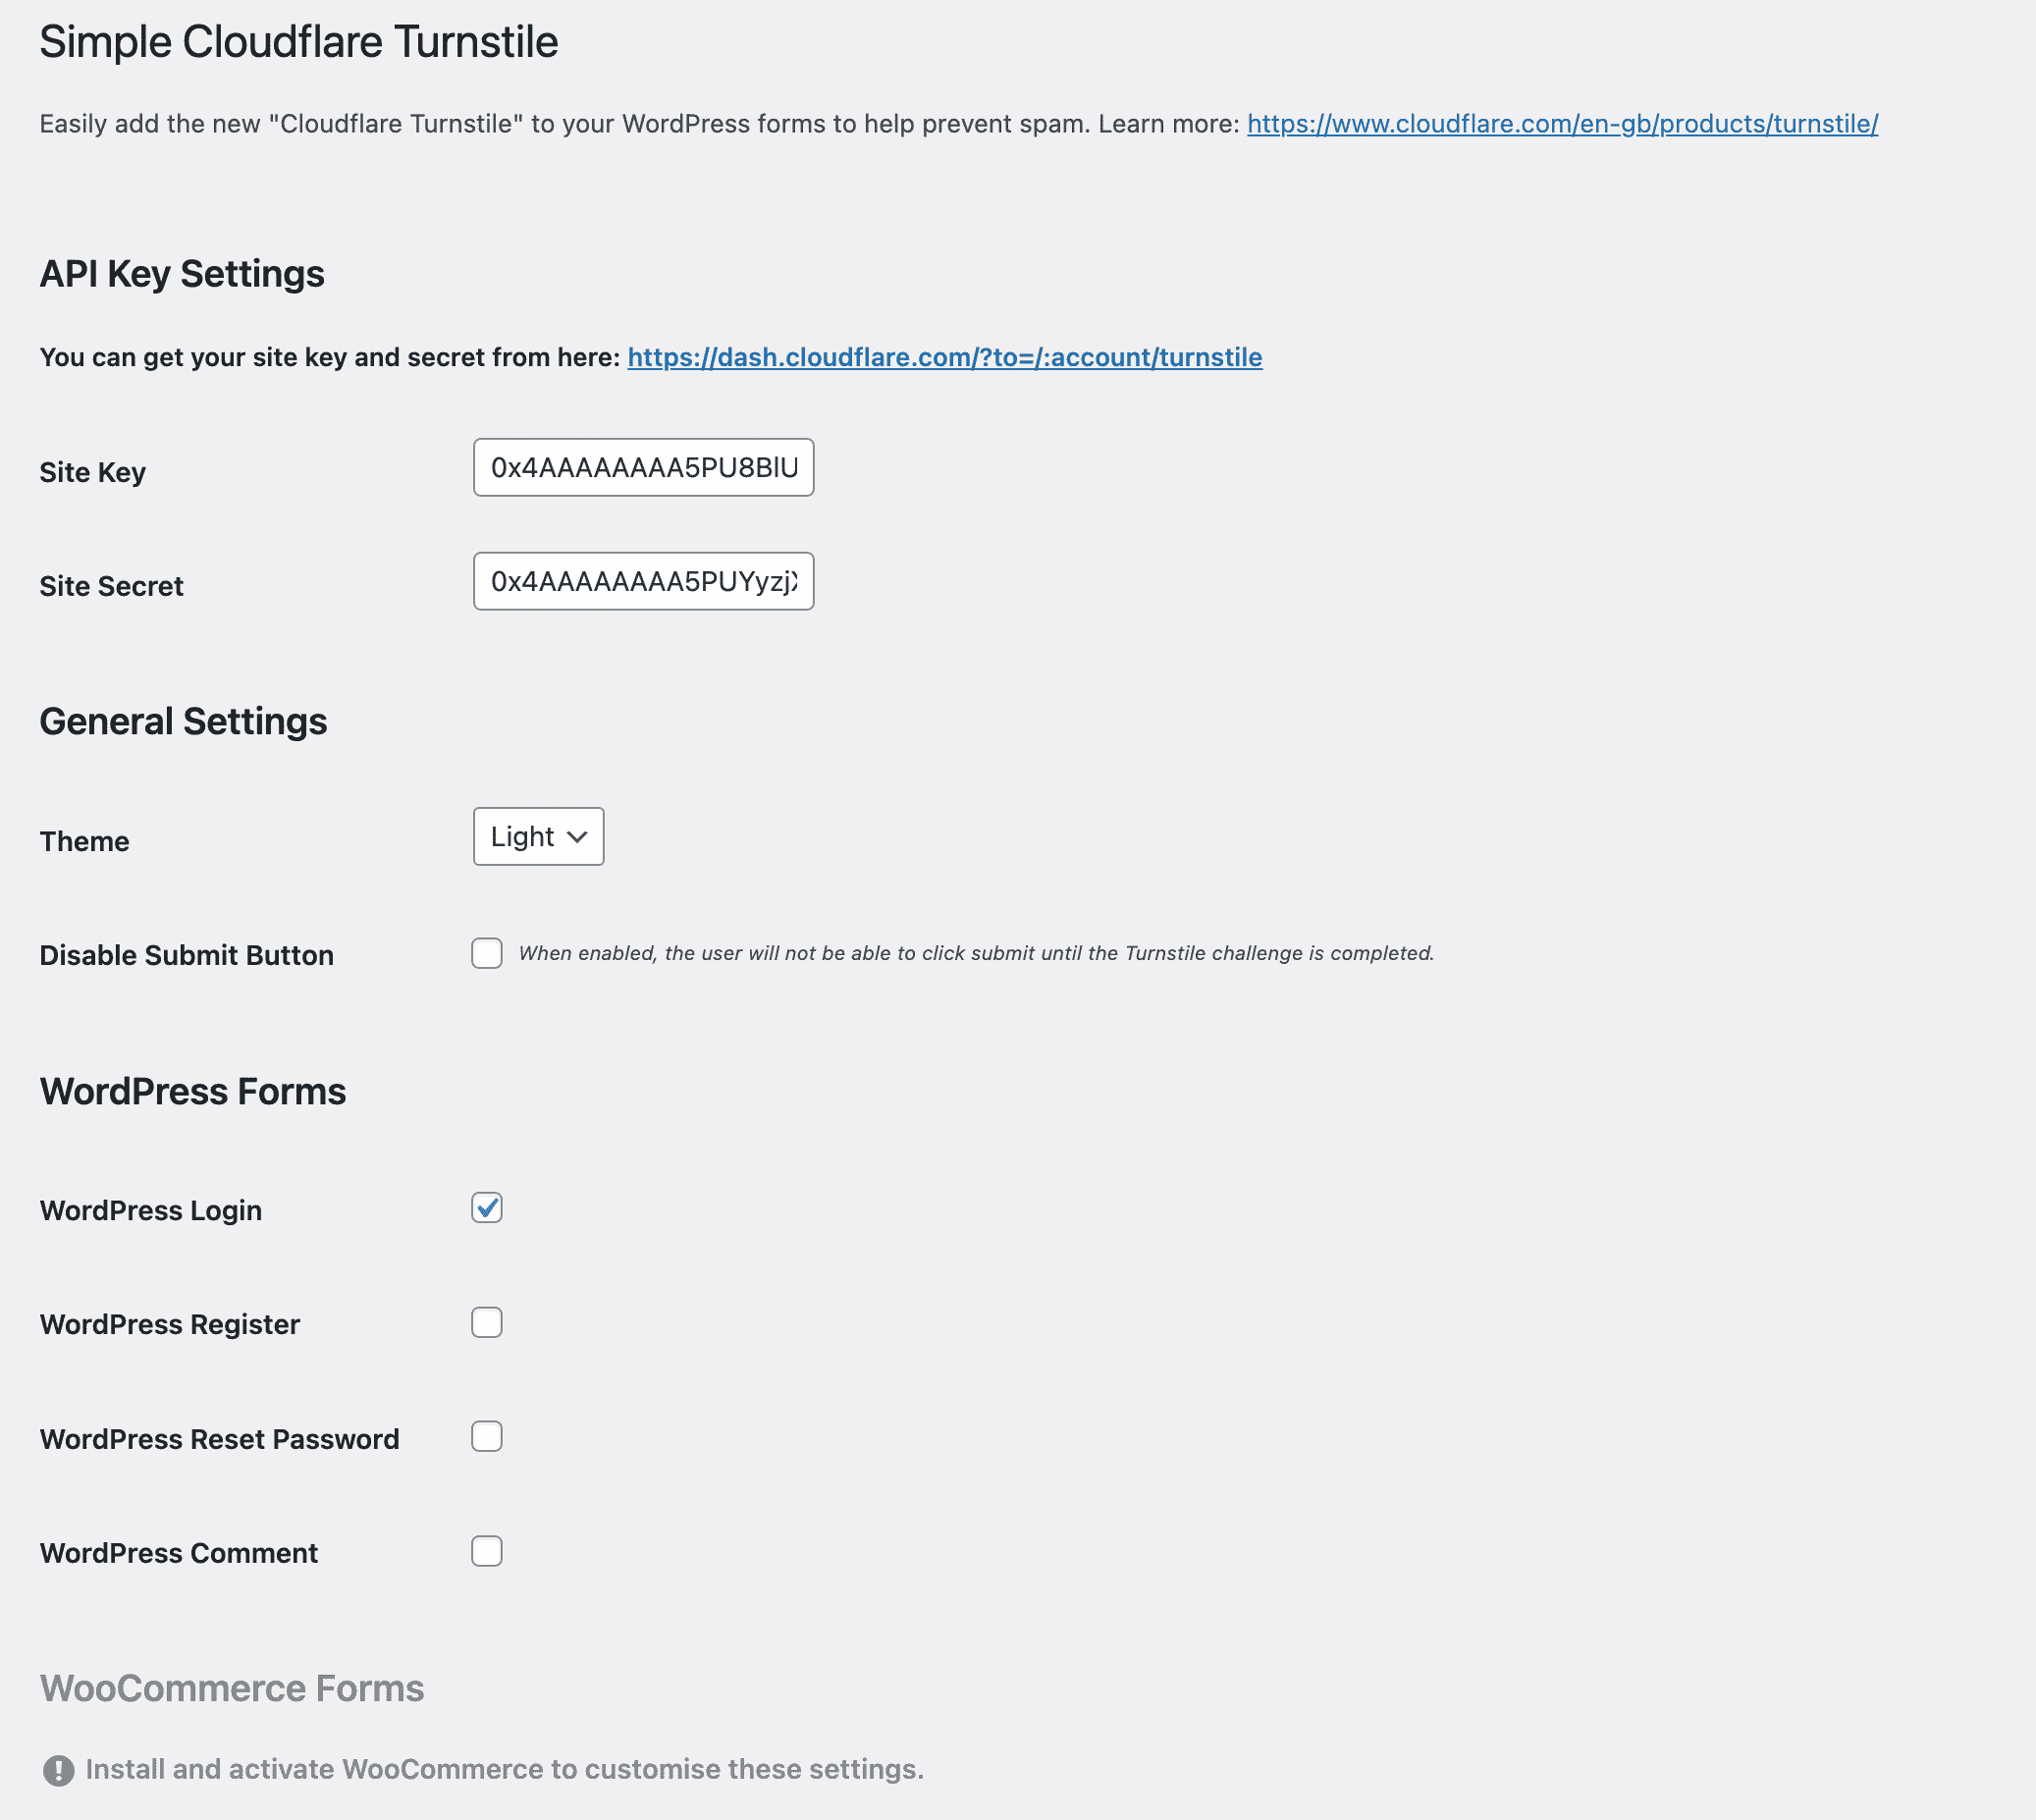
The settings will ask for your site key and secret which is given to you after adding the site to your Cloudflare Turnstile dashboard. After entering these values simple enable parts of your site you’d like Cloudflare Turnstile enabled on.
I’d recommend all of the default WordPress forms and any contact forms you have. If you have WooCommerce or Contact Form 7 installed you’ll see settings for those on this page.
I also like that there is an option for a dark or light theme as well.

After hitting save you’ll start to see Cloudflare Turnstile on your site! Best of all you’ll likely not have to click anything for it to work unlike reCAPTCHA.
3. View Cloudflare Turnstile Stats
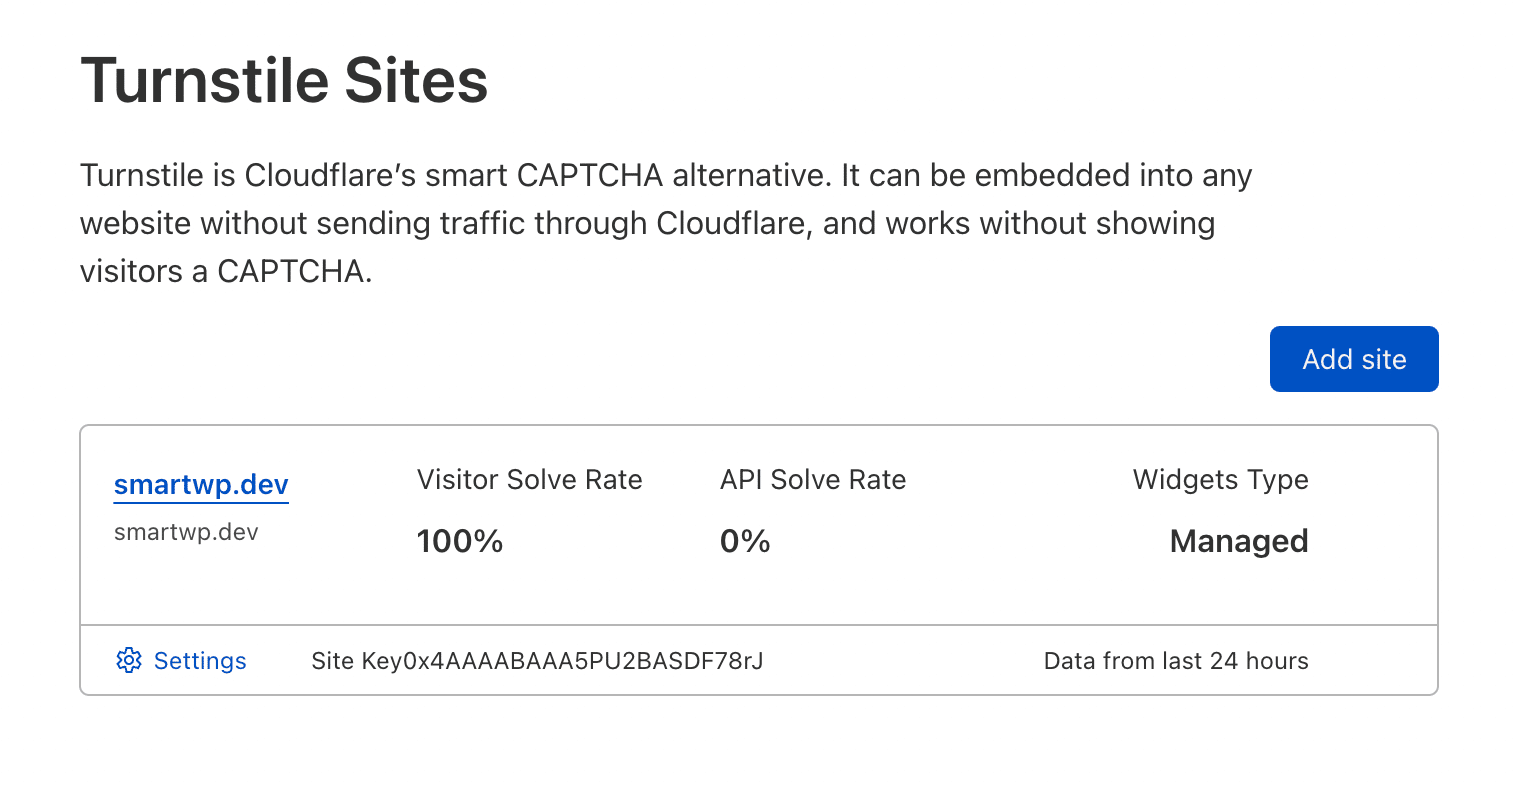
After enabling Cloudflare Turnstile on your WordPress site you can also view stats of how many users are completing it. This can be viewed in your Cloudflare dashboard.
We hope this guide to adding Cloudflare Turnstile to your WordPress site. If you are a WordPress developer you’ll also appreciate the Turnstile developer documentation. If Turnstile plus Akismet still aren’t enough, you can also disable WordPress comments entirely.


10 Responses
i just hear about turnstile and sound interesting.
can we use this service without using any cloudflare product (cdn) ?
You don’t need to use their CDN to use turnstile (plus it’s free!)
can I have just one key for every wpms domain? Its painful to add one per domain… tks! 😉
Sadly you need to use a new key for each domain I think.
Unfortunately, it doesn’t work with multi-page forms using Formidable Forms.
The Turnstile check appears with the Next button on page one, then on page two the Next button is greyed out.
Great guide! Cloudflare Turnstile is a fantastic alternative to reCAPTCHA, especially for those who value privacy and user experience. The step-by-step instructions make it easy to set up, and the integration with WordPress forms and WooCommerce is a big plus. Thanks for sharing this helpful tutorial
its really helps me to secure my domian
This is a really helpful breakdown of Cloudflare Turnstile and why it's such a solid alternative to reCAPTCHA. I like how you clearly explain both the privacy benefits and the improved user experience, since CAPTCHAs are often a pain point for visitors. The step-by-step setup with the Simple Cloudflare Turnstile plugin makes it feel approachable even for non-developers, which is a big win for WordPress site owners. It's also great to see coverage of WooCommerce and popular form plugins, as spam there can be especially frustrating. Overall, this guide strikes a nice balance between security, usability, and privacy, which is exactly what most WordPress sites need today.
thanks for sharing such an amazing content love it really amazing
I've been setting up CAPTCHA solutions on different WordPress sites, and Turnstile has become one of the easiest ways to cut down spam while keeping the user experience smooth. Privacy-focused tools like this make a big difference, especially for login and comment forms where users get frustrated by traditional CAPTCHAs.
I also manage gaming-related pages, and dealing with bots and security issues is a common challenge there too. Tools like Turnstile definitely help create a cleaner and safer user experience across different types of sites.