Whether it’s for migrations or backup there are plenty of reasons to export WordPress menus. Additionally if you use a staging environment and want to move your menus to production this guide will show you how to export your WordPress menus.
Quick note before you start: this guide covers classic menus managed through Appearance > Menus. If your site uses a block theme (introduced in WordPress 5.9), navigation lives in the Navigation block inside the Site Editor instead of Appearance > Menus, and the workflow below doesn’t apply. For block themes, the Navigation block is saved as part of your template and travels with a normal site export; you don’t need a separate menu-export tool.
Today I’ll go over how to use the free “Export WordPress Menus” plugin to export your WordPress menus.
How to Export WordPress Navigation Menus:
First to enable menu items to be exported you’ll need to install and activate the Export WordPress Menus plugin. This is as easy as installing any WordPress plugin.
This can be done by just going to Plugins>Add New and searching “Export WordPress Menus” on the top right.

We’ll be using the plugin by Tyche Softwares.
Now that we have the plugin installed and activated we’ll want to run our export.
2. Run the WordPress Export Tool
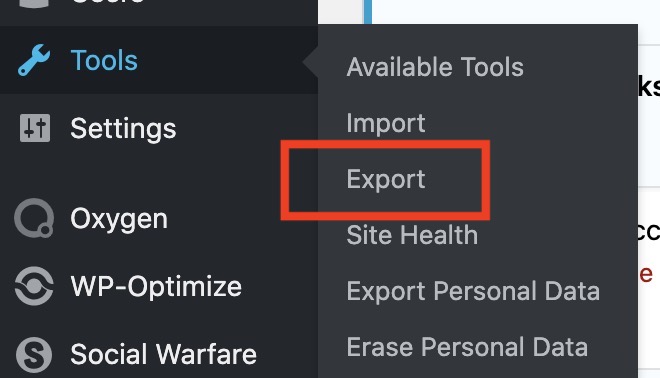
In your admin dashboard sidebar go to Tools>Export.
Here you’ll see a new option to export navigation items.
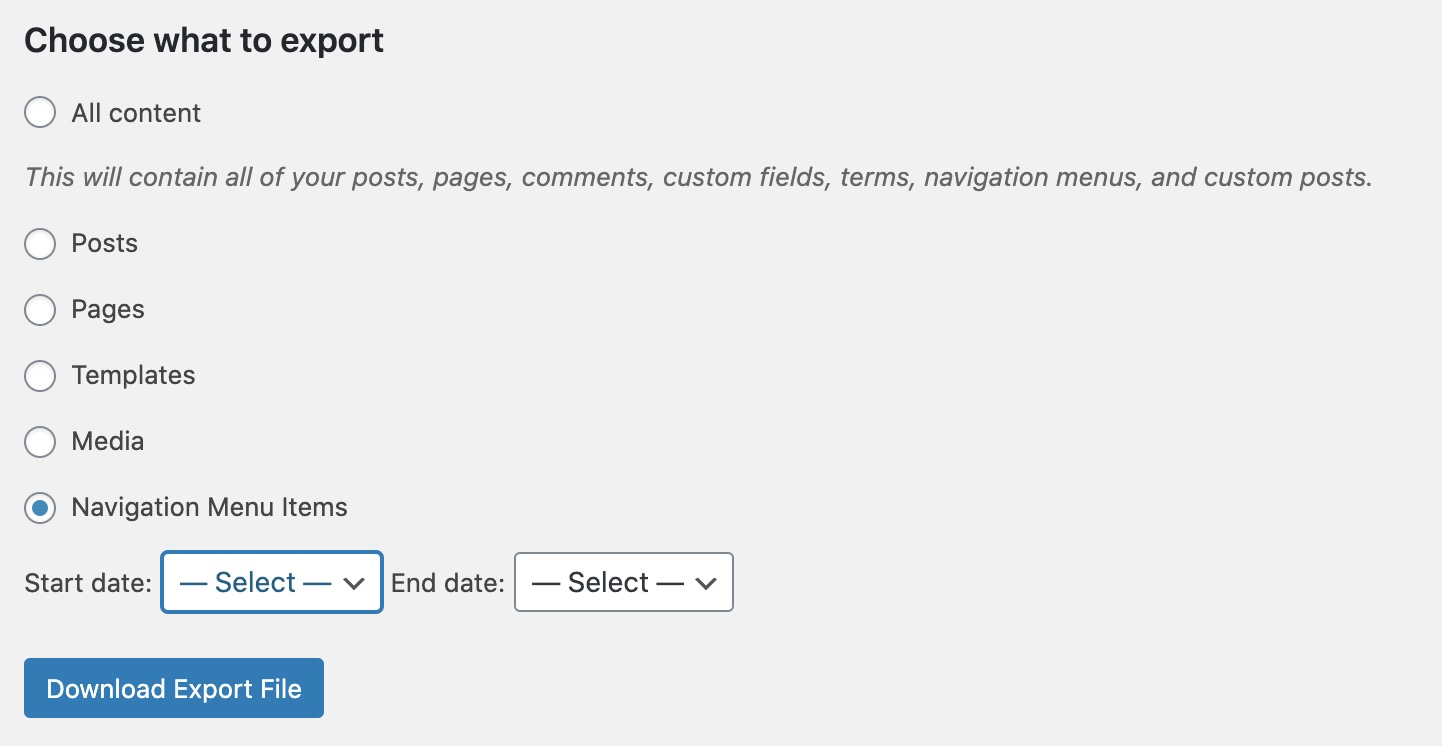
After selecting “Navigation Menu Items” click download export file.
Using this file we’ll import our menu items to our destination site.
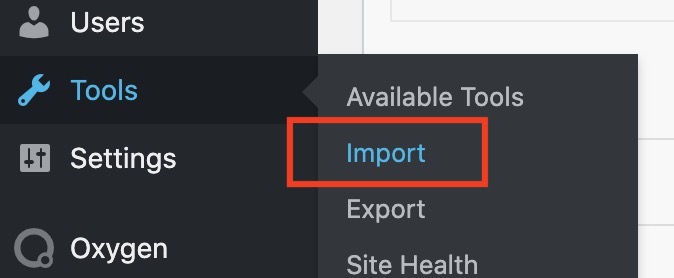
On your destination site head to Tools/Import. Here’ll you’ll have the option to import the menu export file we just made.
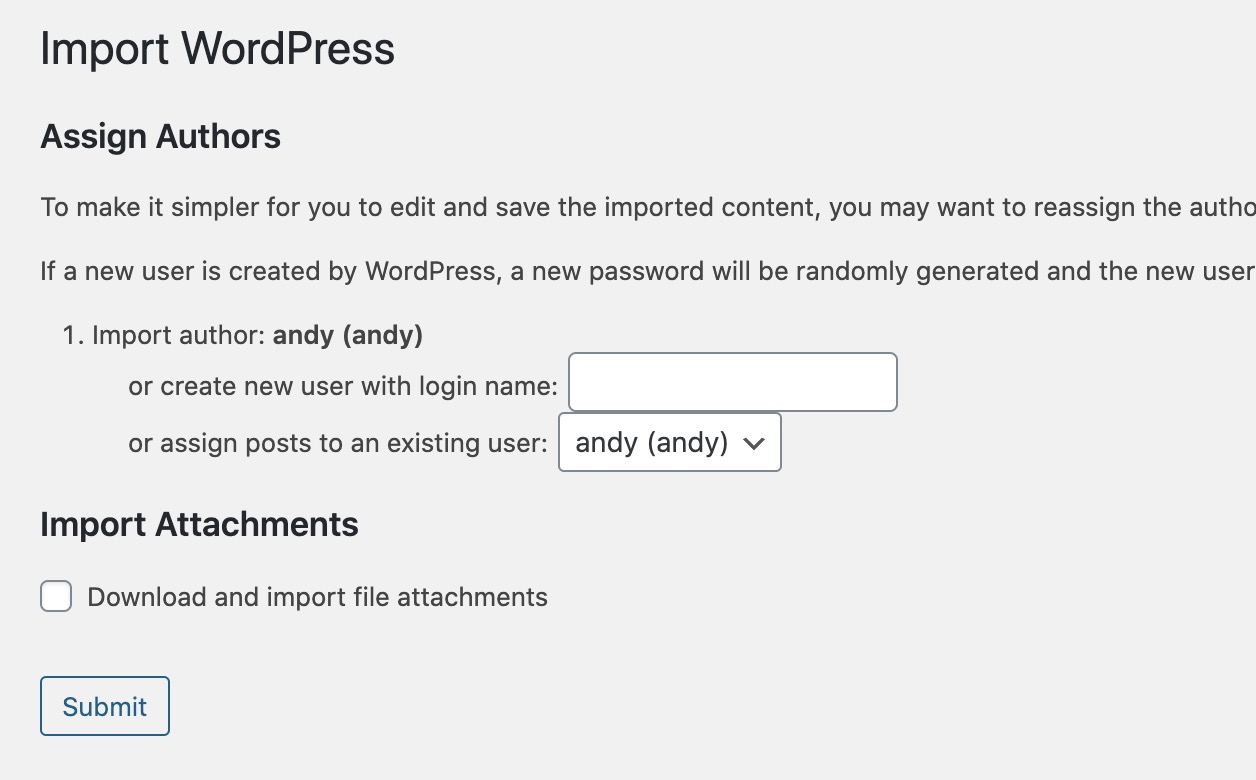
At the very bottom of this screen is the WordPress importer, here you’ll want to click “Run Importer”.

The WordPress importer screen will allow you to upload the export file you just created. Select and upload your file and you’ll be asked what author you’d like to assign the posts to.
After this runs all of your menu items should be migrated and visible in Appearance>Menus.
And just like that you now know how to export WordPress menus. This is perfect for migrating sites, moving menu items from staging environments to production, or just backing up your menu items before making changes. (Again, this workflow is for sites using classic menus; if you’re on a block theme, the Navigation block lives inside your Site Editor templates and exports automatically with the rest of your content.)