Planning on leaving Squarespace for WordPress? Here’s how to migrate all of your Squarespace content to a self-hosted WordPress site.
Squarespace can be great for building your website (RightBlogger has a good breakdown of Squarespace for blogging if you’re still weighing it as an option), but you can’t customize as much as you can with a self-hosted WordPress site.
No matter your reason here is our guide to moving from Squarespace to WordPress.
We’ll go over step-by-step how to export your Squarespace content, how to import it into WordPress, forwarding your domain, and fixing issues that may arise from the migration.
- Migrating from Squarespace to WordPress is six steps: export your content, import it, move images, point DNS, fix permalinks, and troubleshoot.
- Squarespace’s export is limited and doesn’t bring everything, so expect to rebuild some pages and styling.
- Images often need a separate import step, since they don’t all come through the XML export.
- Set up redirects for any changed URLs so you don’t lose search rankings.
1. Export your Squarespace Content
The first thing you’ll need to do is export Squarespace content so that we can use it in our WordPress site.
Note: these are the things that won’t be exported and you’ll need to recreate them manually.
- Design, style and CSS changes
- Product, Index, Event, Cover and Album pages
- Multiple blog pages
You can read more about what is exported on Squarespace.
To export Squarespace content first you’ll need to login to your Squarespace admin home screen.
Once logged in go to Settings, Advanced (near the bottom), Import / Export.

Click export, in the export menu select WordPress

After the export runs you’ll have the option to download your export XML on the left side of the page.

This XML file from Squarespace is what WordPress will use to migrate your content.
2. Import Squarespace Content to WordPress
Now that you have your XML export file we can import Squarespace content to WordPress.
Note: These instructions are for a self-hosted WordPress.org site not a WordPress.com site. WordPress.org sites let you customize your site completely. Learn more about the differences between the two.
First we’ll assume you have a blank WordPress site to work with. If you don’t have a WordPress site check out our list of best WordPress hosts. Any of these companies will quickly create a blank WordPress site for you to start working on your site.
Login to your WordPress site and go to Tools>Import.
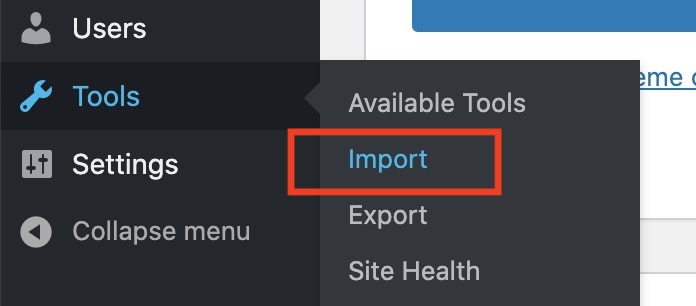
In the import screen we’ll be using the WordPress importer at the bottom.
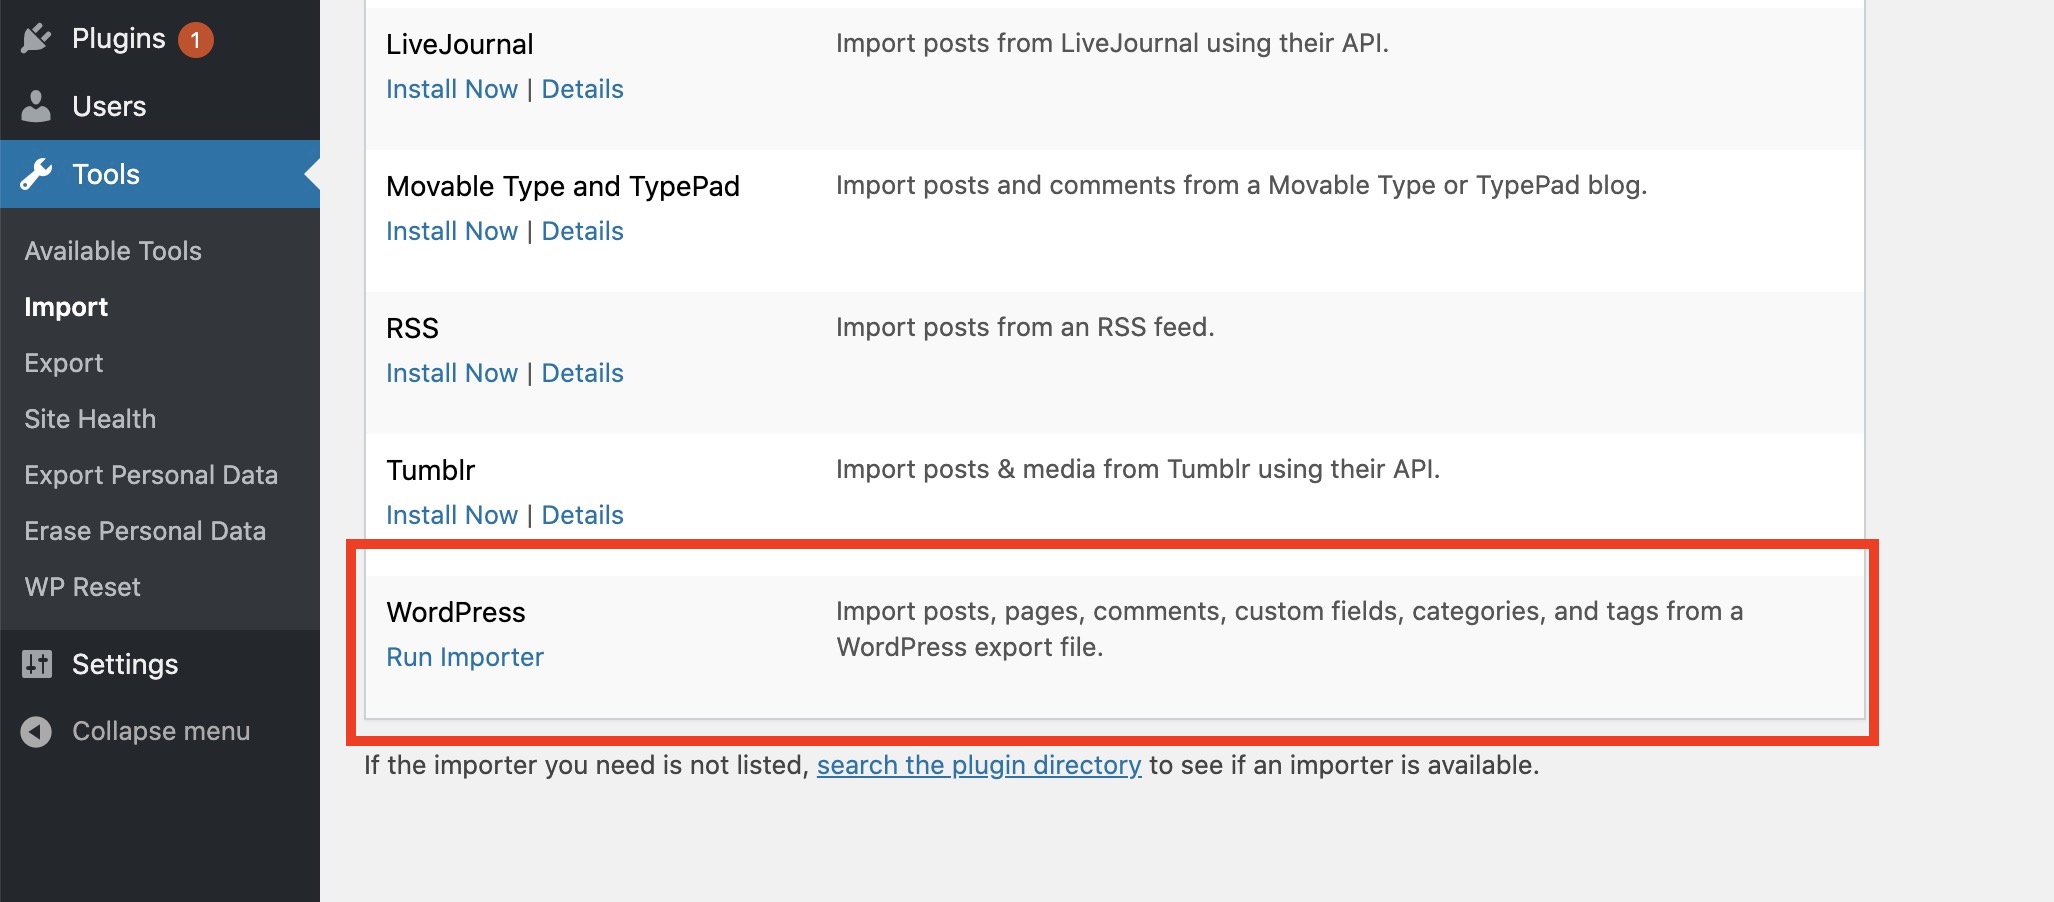
Here we’ll import the XML file that Squarespace generated.
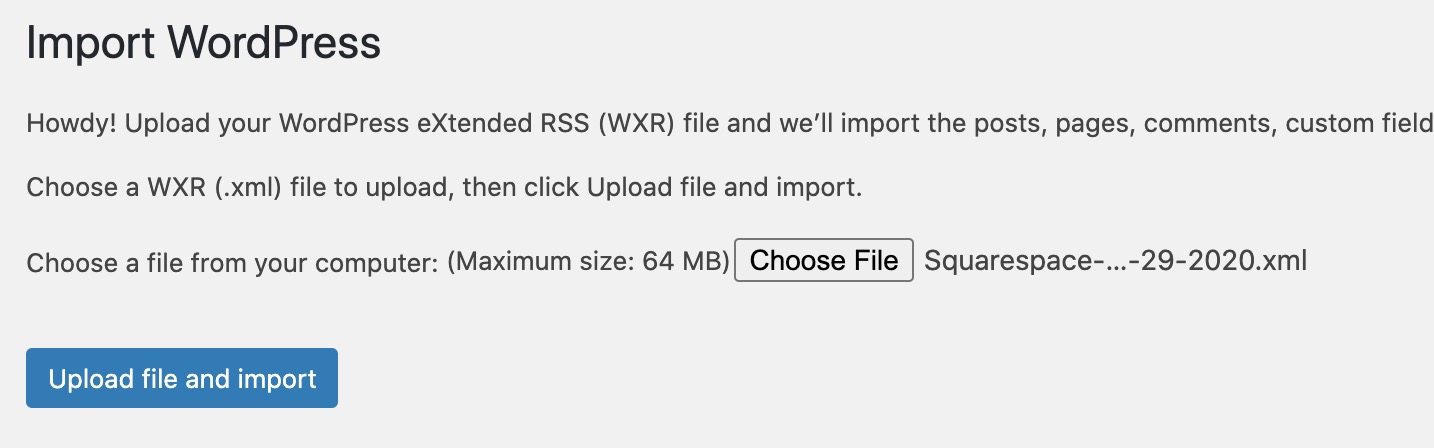
Select your file and click Upload file and import.
Next it’ll ask what author to attribute all of your posts to. This will most likely be the account you’re logged into. Additionally you’ll want to check the button to download attachments.
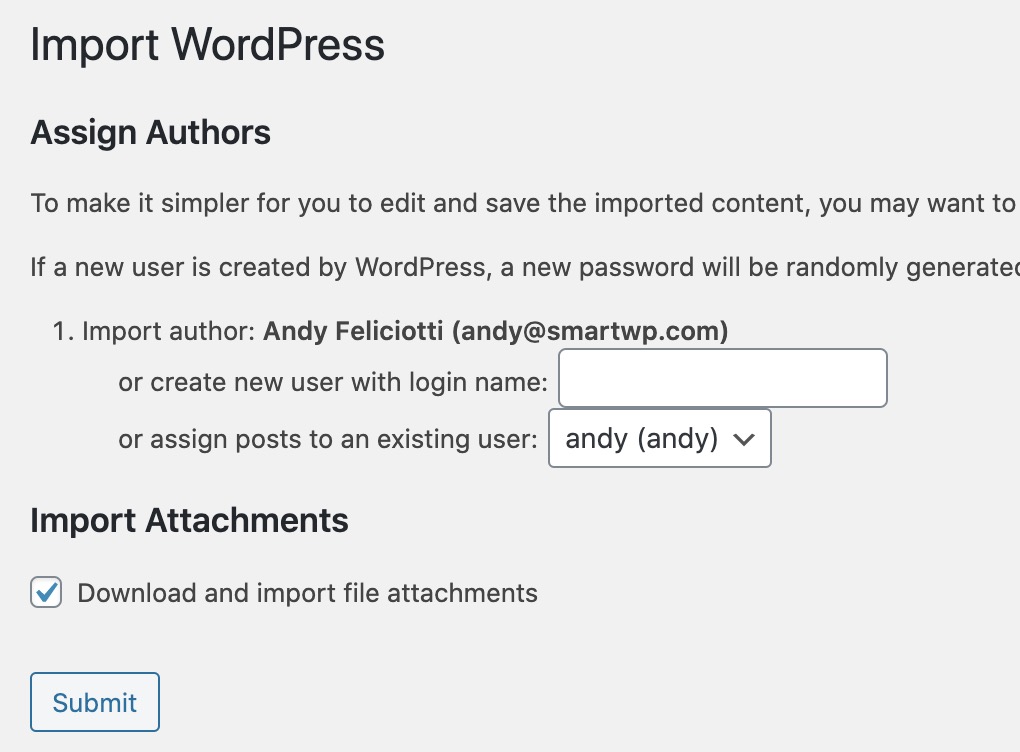
Hit submit and your move from Squarespace to WordPress will start!
Depending on how large your Squarespace site is this could take a few minutes.
Once this is done you should have all of your content in WordPress. You can check what was imported on the left side by going to posts and pages screens.
3. Migrate Squarespace Images to WordPress
Now if you view the HTML of posts you’ll notice image files are still hosted by Squarespace. This will be bad for us since your files will be gone when you cancel your Squarespace account.
Luckily we can use the plugin Auto Upload Images to automatically grab any external images and bring them into your WordPress server.
To install this plugin go to Plugins>add new, here you can search a plugin on the top right. Just type Auto Upload Images and you should see the correct plugin.

Once you click install now and activate you can start to use the plugin.
This plugin will search for image URLs outside of your site in posts and automatically brings them back to your WordPress media library. Plus it’ll automatically change the URLs of the image files to the new one on your site.
The plugin does this when a post or page is edited so you’ll have to go through each post manually and save it again. Or you can use a bulk action to have the plugin run on all of your posts.
Checking the box on top of the posts screen will select all of your posts in view (note if you have more than 20 you can click screen options on the top right and make more than 20 appear on 1 view)
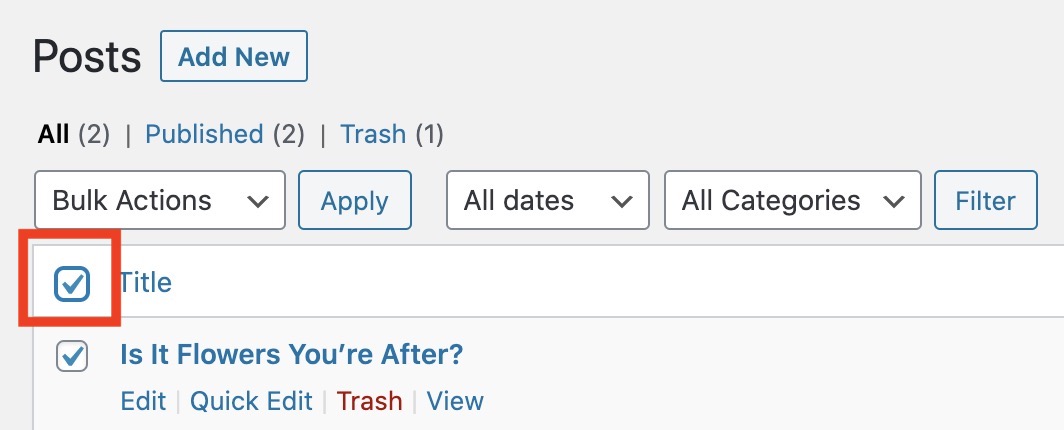
After checking this you can click Bulk Actions and select edit.
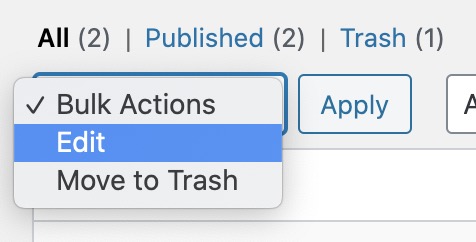
This will pop up a panel of changes you want to make but since we just need to trigger a save we can just click update without making any changes.
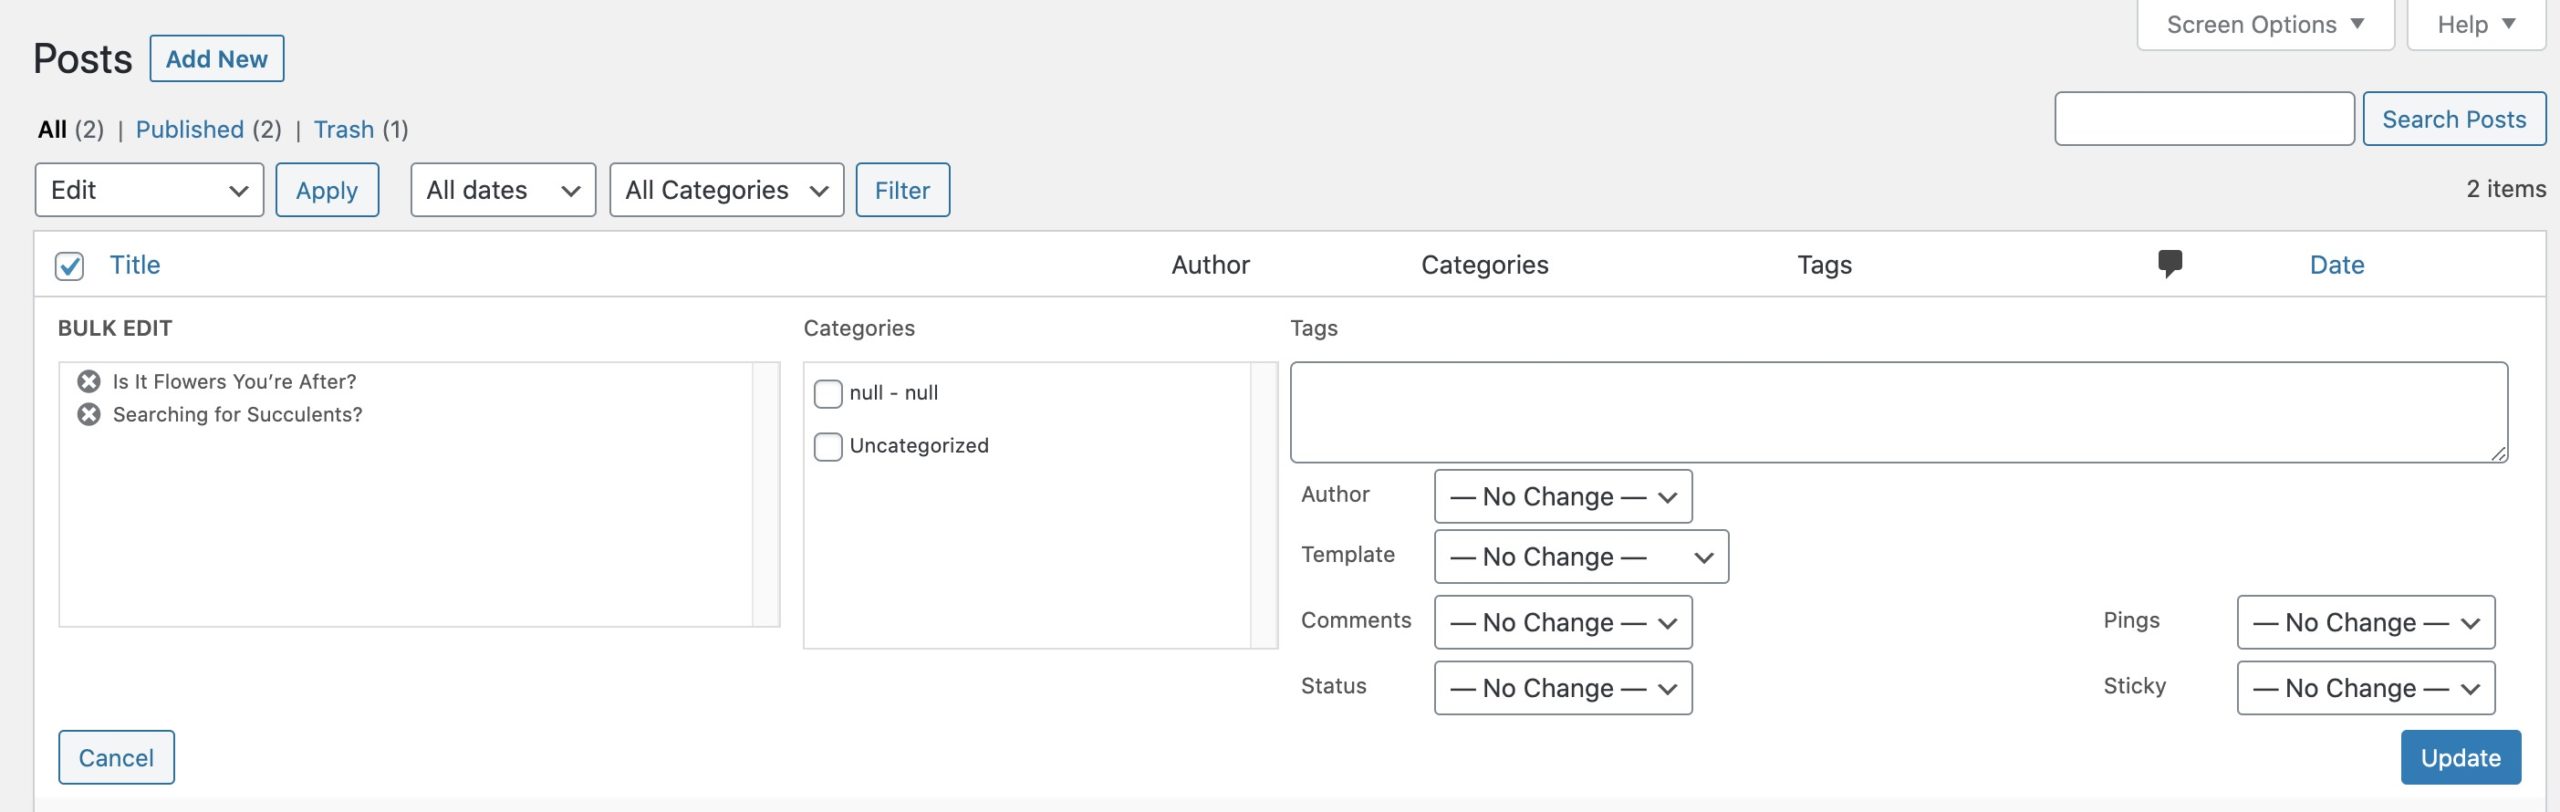
Clicking update will trigger a save in all your posts causing the images to be moves to your WordPress site.
4. Point your DNS to your WordPress Site
Once you have your new WordPress setup to your liking you’ll want to point your domain name to your site. This involves changing your DNS settings so that your domain points to your WordPress server.
If you bought your domain through Squarespace you can use their DNS management tutorial to point your domain.
Regardless of how your domain name is setup your WordPress hosting company can walk you through changing your DNS settings.
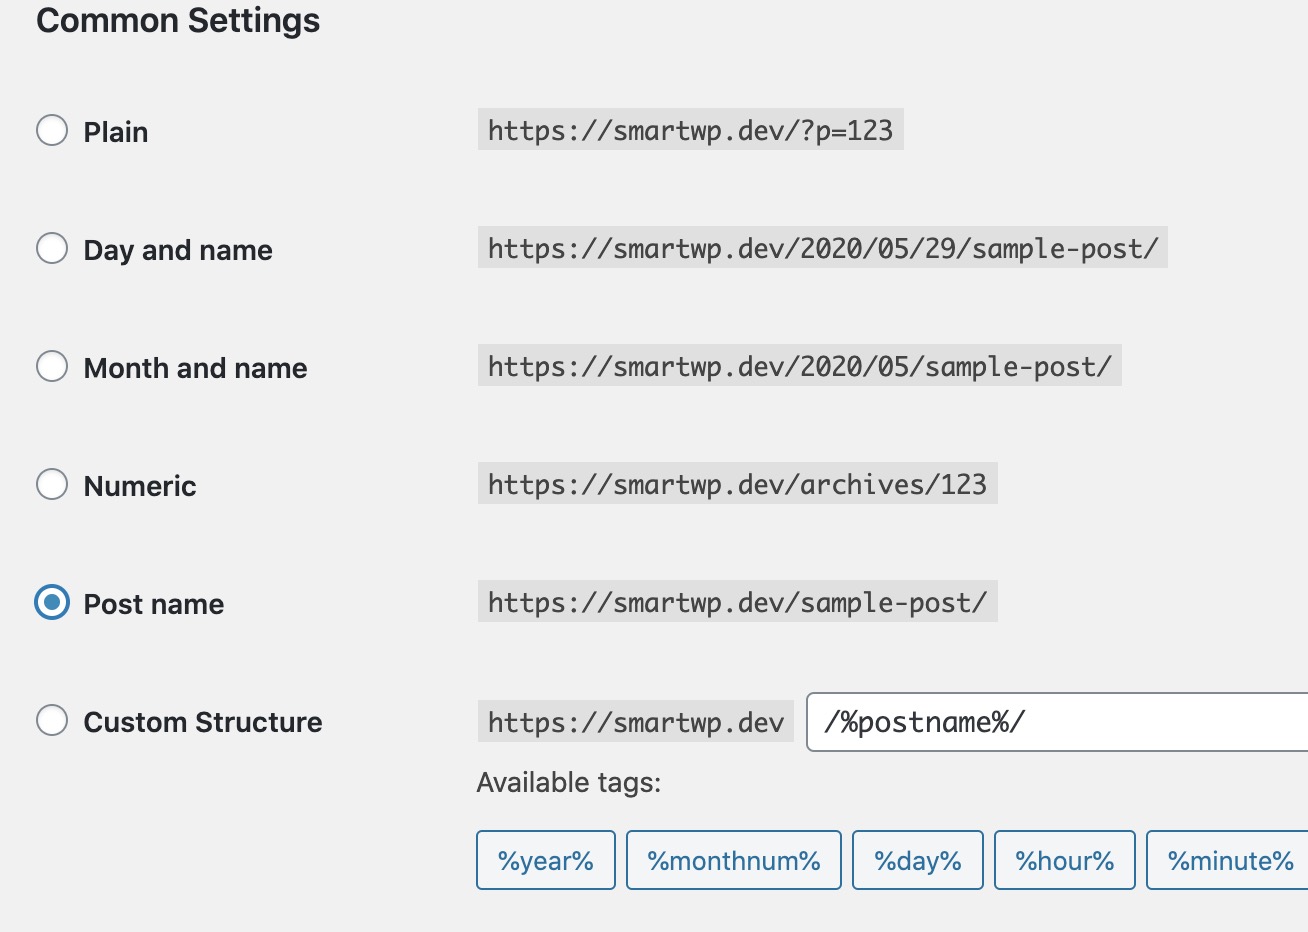
5. Modifying Permalinks and Fixing Broken URLs
Most likely the URL of blog posts in Squarespace was something like this.
yoursite.com/blog/your-post-name
While in WordPress they are similar to this.
yoursite.com/year/date/your-post-name
Now you can make your URLs the same by configuring your permalink settings in WordPress but I recommend keeping your URLs as just /%postname%/. Using just the post name is recommended for SEO reasons.
But we don’t want any URLs going to a 404 page so we can use a plugin like WP 404 Auto Redirect to Similar Post. This plugin will automatically redirect similar URLs to the correct content.
If you want to manually add redirects in WordPress you can use the Easy 301 Redirects plugin. This will allow you to make your own redirect, plus it’ll show you a list of 404 errors so you can make redirects.
6. Troubleshooting Migration Issues
Images inside posts aren’t showing up
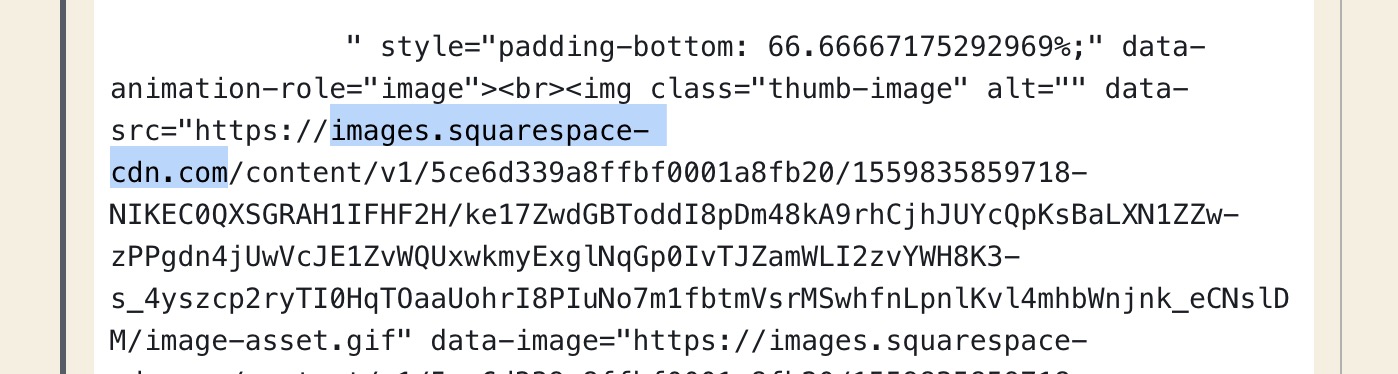
This most likely is happening because Squarespace templates typically use lazy loading to load images in. So now that the script isn’t there to load those images they no longer load.
Luckily we can fix this by doing a find and replace for data-src and changing it to src.
For this we can use the Better Search Replace plugin. You’ll need to run this on your wp_posts database table.
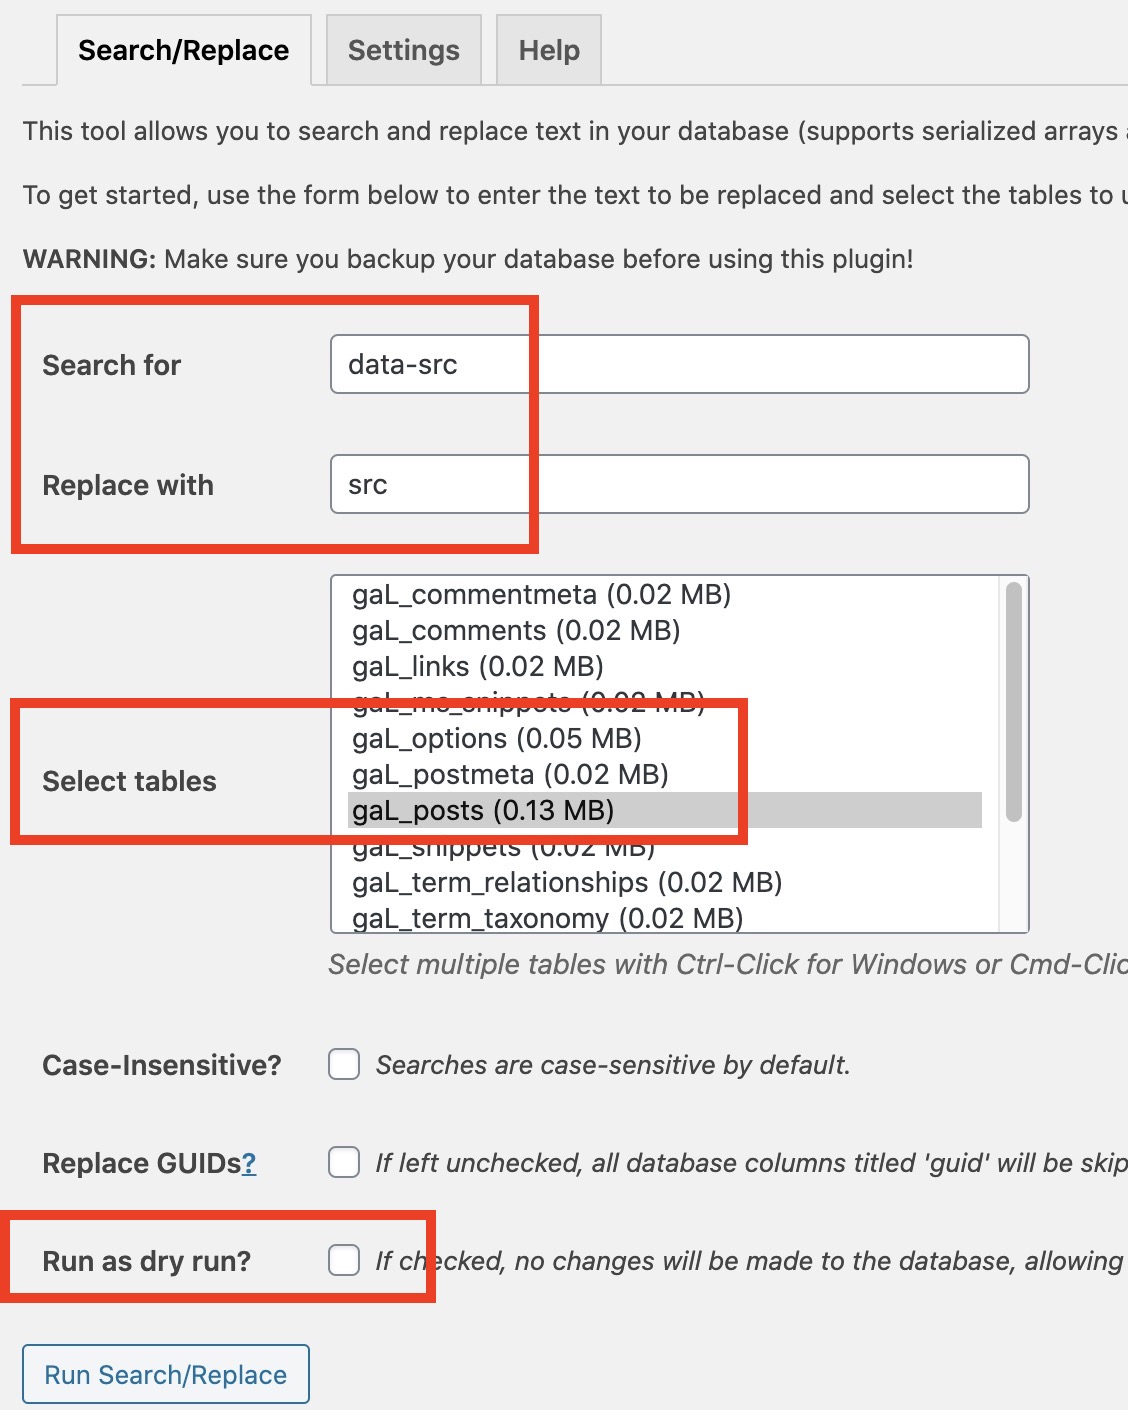
Basically this will find anywhere it says data-src and change it to src. Making the images load correctly. If you want to enable lazy loading on images in WordPress you can use a plugin like A3 Lazy Load.
And just like that you have completed your Squarespace to WordPress migration. You should now have all of your content moved to a new WordPress site.
Now that you have your own self-hosted WordPress site you can explore WordPress plugins and themes.
Having issues transferring your Squarespace site to WordPress? Let us know in the comments.


One Response
Hi, do you know if it’s possoble to migrate a squarespace email address to WordPress and if so, how do do so? Thanks